
My First Encounter with Panna Cotta
It was a humid September evening in a small trattoria tucked into the Langhe hills of Piedmont, and I had just finished a plate of tajarin al burro when the waiter placed something in front of me that I had not ordered. It was white, trembling at the rim, and surrounded by a pool of dark Barolo wine reduction. He said nothing. He just smiled and walked away.
That first spoonful changed how I thought about dessert entirely. There was no crust, no layers, no theatrical flames. Just cream, set to the exact threshold between liquid and solid, carrying a whisper of vanilla and the sweetness of good sugar. I ate the entire thing in silence, then ordered another.
When I got home, I spent the better part of three weeks trying to reproduce it. I overcooked it. I undercooked it. I used too much gelatin and ended up with something that bounced off the plate. I used too little and watched it pool the moment it was unmoulded. Eventually I found the ratio, and the technique, and the handful of rules that govern this recipe. Everything I learned through those trials is in this article.
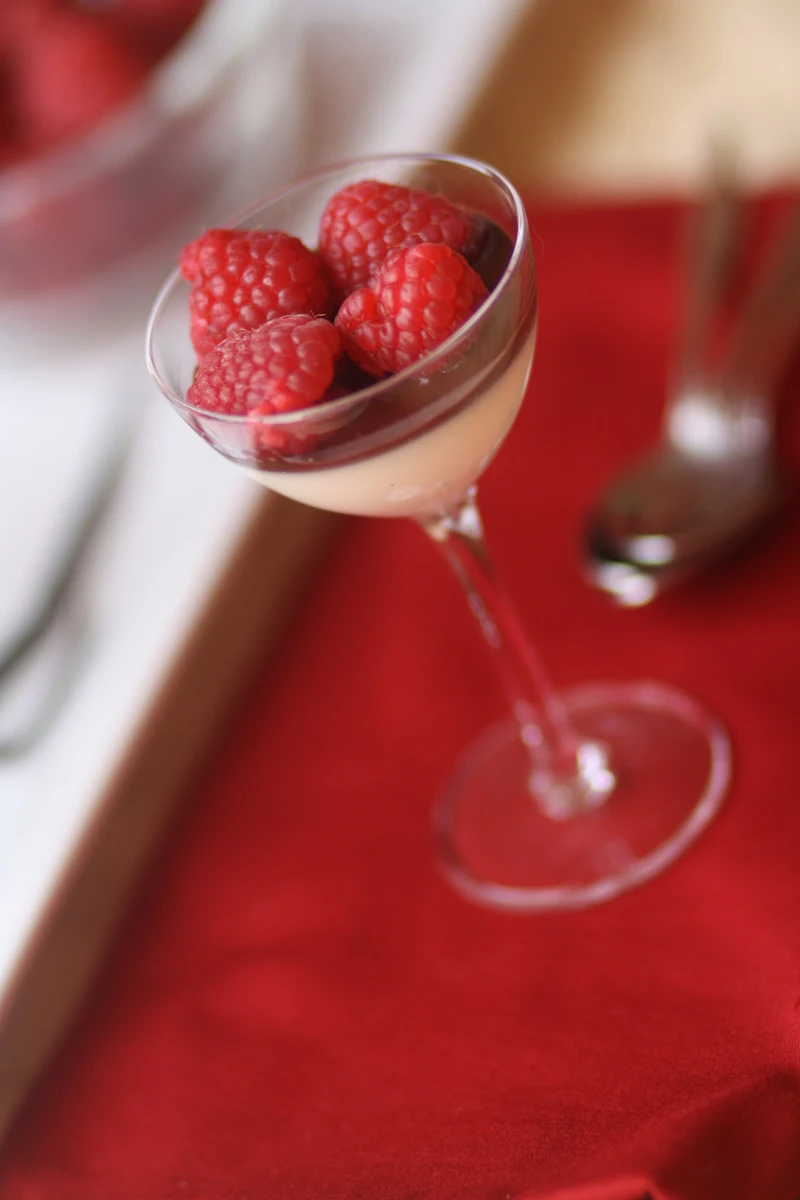
Panna cotta served in glasses — a presentation style that removes the anxiety of unmoulding entirely.
The Piedmontese Roots of Panna Cotta
Panna cotta translates literally as cooked cream, though in practice the cream is barely cooked at all. The dessert comes from the Langhe, a wine-growing region in the southern part of Piedmont in northwestern Italy. The exact date of its creation is not recorded, but food historians generally place its emergence in the early twentieth century, shaped by the dairy culture of the Po Valley where fresh cream was abundant and refrigeration was becoming more accessible to home cooks.
An old Piedmontese tradition calls for the moulds to be lined first with caramelised sugar, the same technique that gives crème caramel its amber cap. This practice predates the cleaner, modern approach of serving panna cotta unadorned or with a poured sauce, and it produces a subtly bitter-sweet note that works beautifully with the neutral flavour of the cream.
Panna cotta was officially recognised as a traditional Italian food product (PAT) by the Italian Ministry of Agricultural, Food and Forestry Policies, which lists it as a cultural heritage food of Piedmont. It was included in the registry to protect regional culinary traditions that risk being forgotten or homogenised through commercial production.
In the 1990s, Italian immigration and the global spread of restaurant culture carried panna cotta to every continent. It became a fixture on tasting menus because it demands almost nothing from the kitchen in terms of heat or equipment, yet it reads as sophisticated. Its neutrality in flavour made it the perfect canvas for a generation of chefs who wanted to show off seasonal ingredients through the coulis, the jelly, or the fruit placed on top.
Today, panna cotta is one of the most searched Italian dessert recipes in the world, and it is made in home kitchens from Mumbai to Melbourne. That is the quiet genius of Piedmont: a region that turned fresh cream, sugar, and a little patience into one of the most enduring desserts in culinary history.
The Four Ingredients and Why Each One Matters
Fresh Cream — the Only Foundation That Works
Panna cotta is not a recipe where you can substitute low-fat milk or single cream and expect the same result. The fat content of the cream is what gives the finished dessert its smoothness and its ability to carry flavour without feeling heavy or watery. I use full-fat fresh cream with a fat content of at least 35%. In Italy this is called panna fresca da cucina. In the UK it is double cream. In the United States it is heavy whipping cream. All three work, and all three produce a correct result.
Do not use UHT cream if you can avoid it. The ultra-high temperature treatment alters the milk proteins and can interfere with how the gelatin sets, sometimes producing a slightly grainy texture. Fresh pasteurised cream from a good dairy gives a noticeably cleaner finish.
Sugar — Caster, Not Granulated
I use caster sugar (superfine sugar) rather than coarse granulated sugar because it dissolves faster and more completely at the moderate temperatures this recipe requires. The quantity in my recipe — 100 g to 500 ml of cream — produces a gently sweet result. If you want a more restrained sweetness, you can reduce this to 80 g. If you are planning to serve the panna cotta with a very tart topping such as passionfruit or rhubarb, keeping the full 100 g is wise.
Vanilla — the Flavour Driver
Vanilla is not a background note in panna cotta; it is the dominant flavour. There is nowhere for it to hide. This means the quality of your vanilla matters more here than in almost any other recipe.
I prefer a good pure vanilla extract from Madagascar Bourbon vanilla beans. The alternative is to split a whole vanilla pod, scrape out the seeds with the back of a knife, and add both the seeds and the empty pod to the cream as it heats. The pod releases additional flavour compounds that extract alone cannot replicate. Remove and discard the pod before adding the gelatin.
Avoid imitation vanilla essence. It contains vanillin synthesised from wood pulp and carries a thin, slightly artificial note that becomes obvious in a dessert this simple.
Gelatin — the Structural Element
Gelatin is what transforms the cream from a pourable liquid into a wobbly, sliceable set. The type you use and the quantity you add are the most technically important decisions in the whole recipe. I address this in full in the next section.
The Gelatin Guide — Getting the Wobble Right
The wobble is the signature of a properly made panna cotta. It should tremble across its entire surface when the plate is gently tilted, hold its shape when cut, and melt the moment it touches your tongue. Achieving that requires understanding what gelatin is and how it behaves.
Sheets Versus Powder
Gelatin sheets (also called leaf gelatin) are my strong preference for this recipe. They produce a cleaner, clearer set with no graininess or off-flavour. The standard weight for a single sheet varies slightly by brand, but most European and American brands produce sheets of approximately 2.5 g each. My recipe calls for 4 sheets, totalling 10 g, per 500 ml of cream.
If you use powdered gelatin, substitute 7 to 8 g of unflavoured powder for the 4 sheets. Bloom the powder by sprinkling it over 3 tablespoons of cold water and leaving it for 5 minutes before adding it to the hot cream.
The Softness Scale
The number of gelatin sheets controls the final texture. Here is how the scale works:
| Sheets per 500 ml | Texture | Best Served |
|---|---|---|
| 2 sheets (5 g) | Very soft, spoonable, barely holds shape | In a glass, never unmoulded |
| 3 sheets (7.5 g) | Soft set, unmoulds but wobbles dramatically | Small moulds, immediate serving |
| 4 sheets (10 g) | Classic wobble, holds shape cleanly, melts on the palate | Standard ramekins or dariole moulds |
| 5 sheets (12.5 g) | Firm, holds a clean slice, less melt-in-mouth | Catering, advance preparation |
Never boil the cream. Boiling partially degrades the gelatin molecules and can cause the dessert to set unevenly or not at all. Heat the cream only until you see small bubbles forming at the edges of the pan, then remove it from the heat immediately before adding the squeezed gelatin.
Vegetarian and Vegan Setting Agents
Standard gelatin is derived from animal collagen and is not suitable for vegetarians or vegans. Agar-agar, a seaweed-derived powder, can replace it, but the technique differs significantly. Agar must be boiled to activate and it produces a firmer, more opaque, slightly less silky set. Use 1 g of agar powder per 100 ml of cream, and bring the cream to a full boil for at least 2 minutes while stirring. The texture will be different but the dessert is still very good. Agar also sets at room temperature, which means it is shelf-stable before chilling, though refrigeration is still needed for serving.
Classic Italian Panna Cotta
Silky set cream with vanilla, from the Langhe hills of Piedmont. This is the four-ingredient version that uses the ideal gelatin ratio for a wobble that holds without turning rubbery. Prep and cook combined take under 25 minutes; the rest is patience.
Ingredients
- 500 ml Full-fat fresh cream (35% fat or above), such as double cream or heavy whipping cream
- 100 g Caster sugar (superfine sugar)
- 4 sheets Gelatin leaves, approx. 2.5 g each (10 g total) — or 7 to 8 g unflavoured gelatin powder
- 1 tsp Pure vanilla extract, or the scraped seeds of 1 vanilla pod plus the empty pod
- 1 pinch Fine sea salt
You will need 4 standard ramekins (150 ml capacity each), or 4 dariole moulds, or simply 4 glasses or small bowls if you prefer to serve without unmoulding. Lightly brush ramekins with a flavourless oil (such as sunflower) before pouring; this helps with release.
Method
-
1Bloom the gelatin
Submerge the gelatin sheets in a wide bowl filled with cold water — not warm, not iced, just cold tap water. Leave them for 5 minutes. They will go from rigid and crinkled to soft and floppy, like thin damp fabric. If using powder, sprinkle it over 3 tablespoons of cold water in a small bowl and leave undisturbed for 5 minutes until it swells and turns gel-like.
-
2Heat the cream
Pour the cream into a medium heavy-bottomed saucepan. Add the caster sugar, the pinch of fine sea salt, and the vanilla extract (or vanilla seeds and the scraped pod). Set the pan over medium-low heat. Stir gently and continuously with a silicone spatula. You are looking for a bare simmer: small bubbles forming lazily at the sides, the surface just beginning to shiver. This takes about 6 to 8 minutes. The moment you reach this point, pull the pan off the heat immediately.
-
3Melt the gelatin into the cream
Lift the soaked gelatin sheets out of the cold water and press them between both palms, squeezing out every single drop of water as firmly as you can. Drop the squeezed sheets directly into the hot cream off the heat. Stir calmly and continuously for 90 seconds to 2 minutes until the gelatin has melted completely and the mixture is perfectly smooth. If using bloomed powder, tip the entire gel into the hot cream and stir the same way. If you used a vanilla pod, fish it out and discard it now.
-
4Strain and cool slightly
Set a fine-mesh strainer over a medium pouring jug and pour the cream mixture through it to catch any undissolved gelatin or vanilla pod fragments. Do not skip this step; it is the difference between a silky result and a slightly grainy one. Allow the strained cream to sit at room temperature for 10 to 15 minutes, stirring occasionally. This cooling period prevents a skin from forming on the surface of your moulds after pouring.
-
5Pour and refrigerate
Divide the cooled cream evenly among your 4 lightly oiled ramekins or moulds. A kitchen scale is more reliable here than estimating by eye — aim for approximately 125 ml per mould. Cover each one loosely with a small square of cling film, touching the film to the rim of the mould but not pressing it onto the surface of the cream. Refrigerate for at least 4 hours. Overnight is better. The panna cotta needs the full chill time to set completely from the edges inward.
-
6Unmould and serve
Remove the moulds from the fridge 5 minutes before serving. Run the tip of a small offset spatula or a thin butter knife gently around the inside rim of each mould, pressing against the mould wall rather than digging into the cream. Place a chilled serving plate face-down on top of the mould. Hold plate and mould together firmly and invert them in one confident motion. Give the mould a single, controlled downward shake. You will hear and feel the panna cotta drop. Lift the mould away slowly. Spoon your topping around or over the top and serve within a few minutes.
Nutrition per Serving
Approximate values based on the base recipe without toppings.
Step-by-Step Technique Notes

The perfect unmoulded panna cotta holds its cylindrical shape but visibly trembles — that is the texture you are aiming for.
On Choosing the Right Pan
A heavy-bottomed saucepan distributes heat more evenly than a thin stainless steel pan and dramatically reduces the risk of hot spots that could cause the cream to catch or scorch on the base. A 1.5-litre pan is the right size for this quantity of cream; it gives enough surface area for the heat to distribute and enough depth that the cream does not spit when it approaches its simmer.
On the Temperature of the Cream
The words bare simmer are doing a lot of work in this recipe. You are looking for a temperature of around 82 to 85 degrees Celsius (180 to 185 Fahrenheit). If you have a kitchen thermometer, use it until you develop an instinct for what this looks like. The surface of the cream will start to show very gentle movement. Small bubbles will appear at the rim. The cream will look as though it wants to boil but has not yet committed. That is your moment. Remove the pan from the heat at this precise point.
On Squeezing the Gelatin
This step is always underestimated. Each gelatin sheet absorbs a meaningful amount of cold water during blooming. If you drop them into the cream without squeezing firmly, that water dilutes the cream, slightly changes the ratio of gelatin to liquid, and can contribute to a mildly grainy or watery texture. Squeeze the sheets as firmly as possible between both palms over the sink until you can feel no more moisture releasing.
On Oiling the Moulds
A very light film of flavourless oil brushed onto the inner surface of each ramekin creates a microscopic lubricating layer between the cream and the mould. Sunflower oil, grapeseed oil, or neutral vegetable oil all work. Avoid olive oil, which has its own detectable flavour. Apply with a pastry brush or a folded piece of kitchen paper, and tip any excess out. The film should be barely visible.
The Unmoulding Moment
More panna cottas have been damaged by hesitant unmoulding than by any failure of technique in the kitchen. Once you have loosened the edges and positioned the plate, the inversion and the downward shake must be committed and confident. Timid movement leaves the panna cotta clinging to the mould while it slowly deforms. One firm, unhesitating shake is all that is needed. If it does not release after two attempts, briefly dip the base of the mould in warm (not hot) water for 3 seconds and try again.
If unmoulding is not your preferred style, simply pour the cooled cream directly into glasses, coupes, or ramekins without oiling. Let the cream set in those containers and serve them as-is. The dessert looks beautiful in a clear glass where you can see the layers of cream and topping. This approach works especially well for buffet settings or informal gatherings.
Flavour Variations Worth Trying
The classic vanilla version is the foundation, but panna cotta takes flavour additions beautifully. The following variations all use the same base recipe and method. Only the flavouring step changes.
| Variation | What to Add and When | Best Paired With |
|---|---|---|
| Espresso | Dissolve 2 teaspoons of instant espresso powder in the cream as it heats, along with the sugar. Remove the vanilla. Produces a dark, rich, coffee-set cream. | Salted caramel sauce, crushed amaretti biscuits |
| Lemon Zest | Add the zest of 1 large unwaxed lemon to the cream along with the vanilla. Strain out the zest through the sieve after steeping for 10 minutes. Subtle and floral. | Limoncello syrup, fresh blueberries, shortbread crumble |
| Rose Water | Replace the vanilla extract with 1.5 teaspoons of food-grade rose water. Add after removing the cream from heat to preserve the floral note. Use a quality brand; cheap rose water tastes synthetic. | Crushed pistachios, fresh strawberries, raspberry coulis |
| Bitter Chocolate | Whisk 2 tablespoons of Dutch-process cocoa powder into a small amount of the hot cream to make a smooth paste, then stir the paste back into the main pan before adding gelatin. No additional sugar adjustments needed. | Orange segments, candied orange peel, whipped cream |
| Cardamom and Saffron | Crack 6 cardamom pods, add to cream as it heats along with a large pinch of saffron threads. Allow to steep for 10 minutes off the heat before straining and proceeding. Warmly spiced, golden-hued. | Mango puree, toasted flaked almonds, honey drizzle |
| Coconut (Vegan) | Replace dairy cream with the same volume of full-fat coconut cream. Use agar-agar (1 g per 100 ml) instead of gelatin. Bring to a full boil for 2 minutes. Replace vanilla with a strip of lime zest and 0.5 teaspoon of vanilla extract. | Fresh mango, toasted coconut flakes, passion fruit pulp |
Seasonal Toppings Guide
Because the flavour of panna cotta is intentionally neutral, the topping is where you express the season and your own palate. These are the combinations I return to most often throughout the year.
Storage and Make-Ahead Tips
Panna cotta is one of the most hospitable desserts in the kitchen from a timing perspective. It actively benefits from being made the night before service because the longer chill time produces a more thoroughly set, smoother result than the minimum 4-hour version.
In the Refrigerator
Covered tightly with cling film, panna cotta keeps well for up to 4 days in the refrigerator. Press the film directly onto the surface of each panna cotta or onto the rim of the mould to prevent a skin from forming or the cream from absorbing any refrigerator odours. Always add toppings immediately before serving. A sauce or fruit compote applied hours in advance will begin to weep liquid into the cream and soften the surface.
Freezing
I do not recommend freezing panna cotta. Freezing causes ice crystals to form within the set cream, and when it thaws the texture becomes noticeably grainy and the gelatin structure breaks down partially. The refrigerator shelf life of 4 days is generous enough that freezing should never be necessary.
Making in Advance for Events
For a dinner party, I make the panna cotta the morning before the event, or even the evening before. I cover each mould with cling film and store them in a single layer in the fridge. The toppings I prepare no more than 2 hours in advance. When it is time to plate up, I unmould directly onto pre-chilled plates — chilling the serving plate for 10 minutes before service helps the panna cotta maintain its temperature longer at the table.
For a buffet or party setting, the glass-served version is far more practical than unmoulded. Pour the panna cotta into individual shot glasses, small coupes, or dessert cups the day before. All that remains on the day itself is spooning the topping over each one. No unmoulding, no stress, and the presentation looks deliberately elegant rather than improvised.
Frequently Asked Questions
How many gelatin sheets do I need for 500 ml of cream?
For a softly set, wobbly panna cotta that unmoulds cleanly, use 4 standard gelatin sheets (about 10 g total) per 500 ml of cream. Using fewer sheets gives a spoonable texture that stays in a glass; using more produces a firmer, bouncier set. I have tested this ratio many times and 4 sheets is the sweet spot for the classic restaurant-style wobble.
Can I use gelatin powder instead of gelatin sheets?
Yes. Replace the 4 sheets with 7 to 8 g of unflavoured gelatin powder. Sprinkle it over 3 tablespoons of cold water in a small bowl and leave it undisturbed for 5 minutes until it swells and turns gel-like. Then stir the bloomed gel into the hot cream exactly as you would with squeezed sheets. One important difference: with powder you cannot squeeze out excess water, so the cream ratio may be very slightly more dilute. This is rarely noticeable in the final result.
Why did my panna cotta not set properly?
There are three common causes. The first and most frequent is that the cream was brought to a boil rather than a bare simmer. Boiling degrades the gelatin molecules and reduces their setting power. The second cause is not squeezing the gelatin sheets firmly enough before adding them to the cream, which adds excess water and dilutes the mixture. The third cause is not allowing sufficient chilling time; 4 hours is the minimum, and a panna cotta removed from the fridge at the 2-hour mark will not be fully set through the centre.
Can panna cotta be made dairy-free or vegan?
Full-fat coconut cream is the best dairy substitute. It has a similar fat content to fresh dairy cream and produces a beautifully set, slightly tropical result. For a vegan setting agent, use agar-agar at a ratio of 1 g per 100 ml of cream. Agar must be boiled (not just simmered) to activate fully, so bring the coconut cream and agar mixture to a rolling boil while stirring and hold it there for 2 full minutes. The texture will be slightly firmer and more opaque than gelatin-set panna cotta, but the flavour is excellent.
How long does panna cotta keep in the fridge?
Panna cotta keeps well in the refrigerator for up to 4 days when covered tightly with cling film. Add toppings only at the moment of serving, not in advance, to prevent them from weeping into the surface of the cream. After 4 days, the gelatin structure begins to change slightly and the texture becomes less silky, so I would not push it beyond that point.
Is panna cotta gluten-free?
Yes, the classic four-ingredient base recipe is naturally gluten-free. Always check the labels on your vanilla extract and any decorative toppings such as biscuits, crumbles, or pre-made sauces to confirm they contain no gluten-based additives or thickeners. The gelatin itself, whether in sheet or powder form, is gluten-free.
Can I use milk instead of cream?
Some recipes use a mixture of cream and whole milk (typically a 2 to 1 ratio of cream to milk) to produce a lighter, less rich result. This works technically and sets properly with the same gelatin quantity. However, the texture is thinner and less luxurious than the full-cream version, and the flavour carries less depth. I do not recommend using only milk, as the fat content is insufficient to produce the silky, melting quality that defines a good panna cotta.