Microwave Vegetable Pulao Recipe
No guesswork. No sticky rice. This is the recipe with exact watt levels, the soaking science behind fluffy grains, and the spice blooming trick that transforms a home kitchen into something that smells like the inside of a proper dhaba.
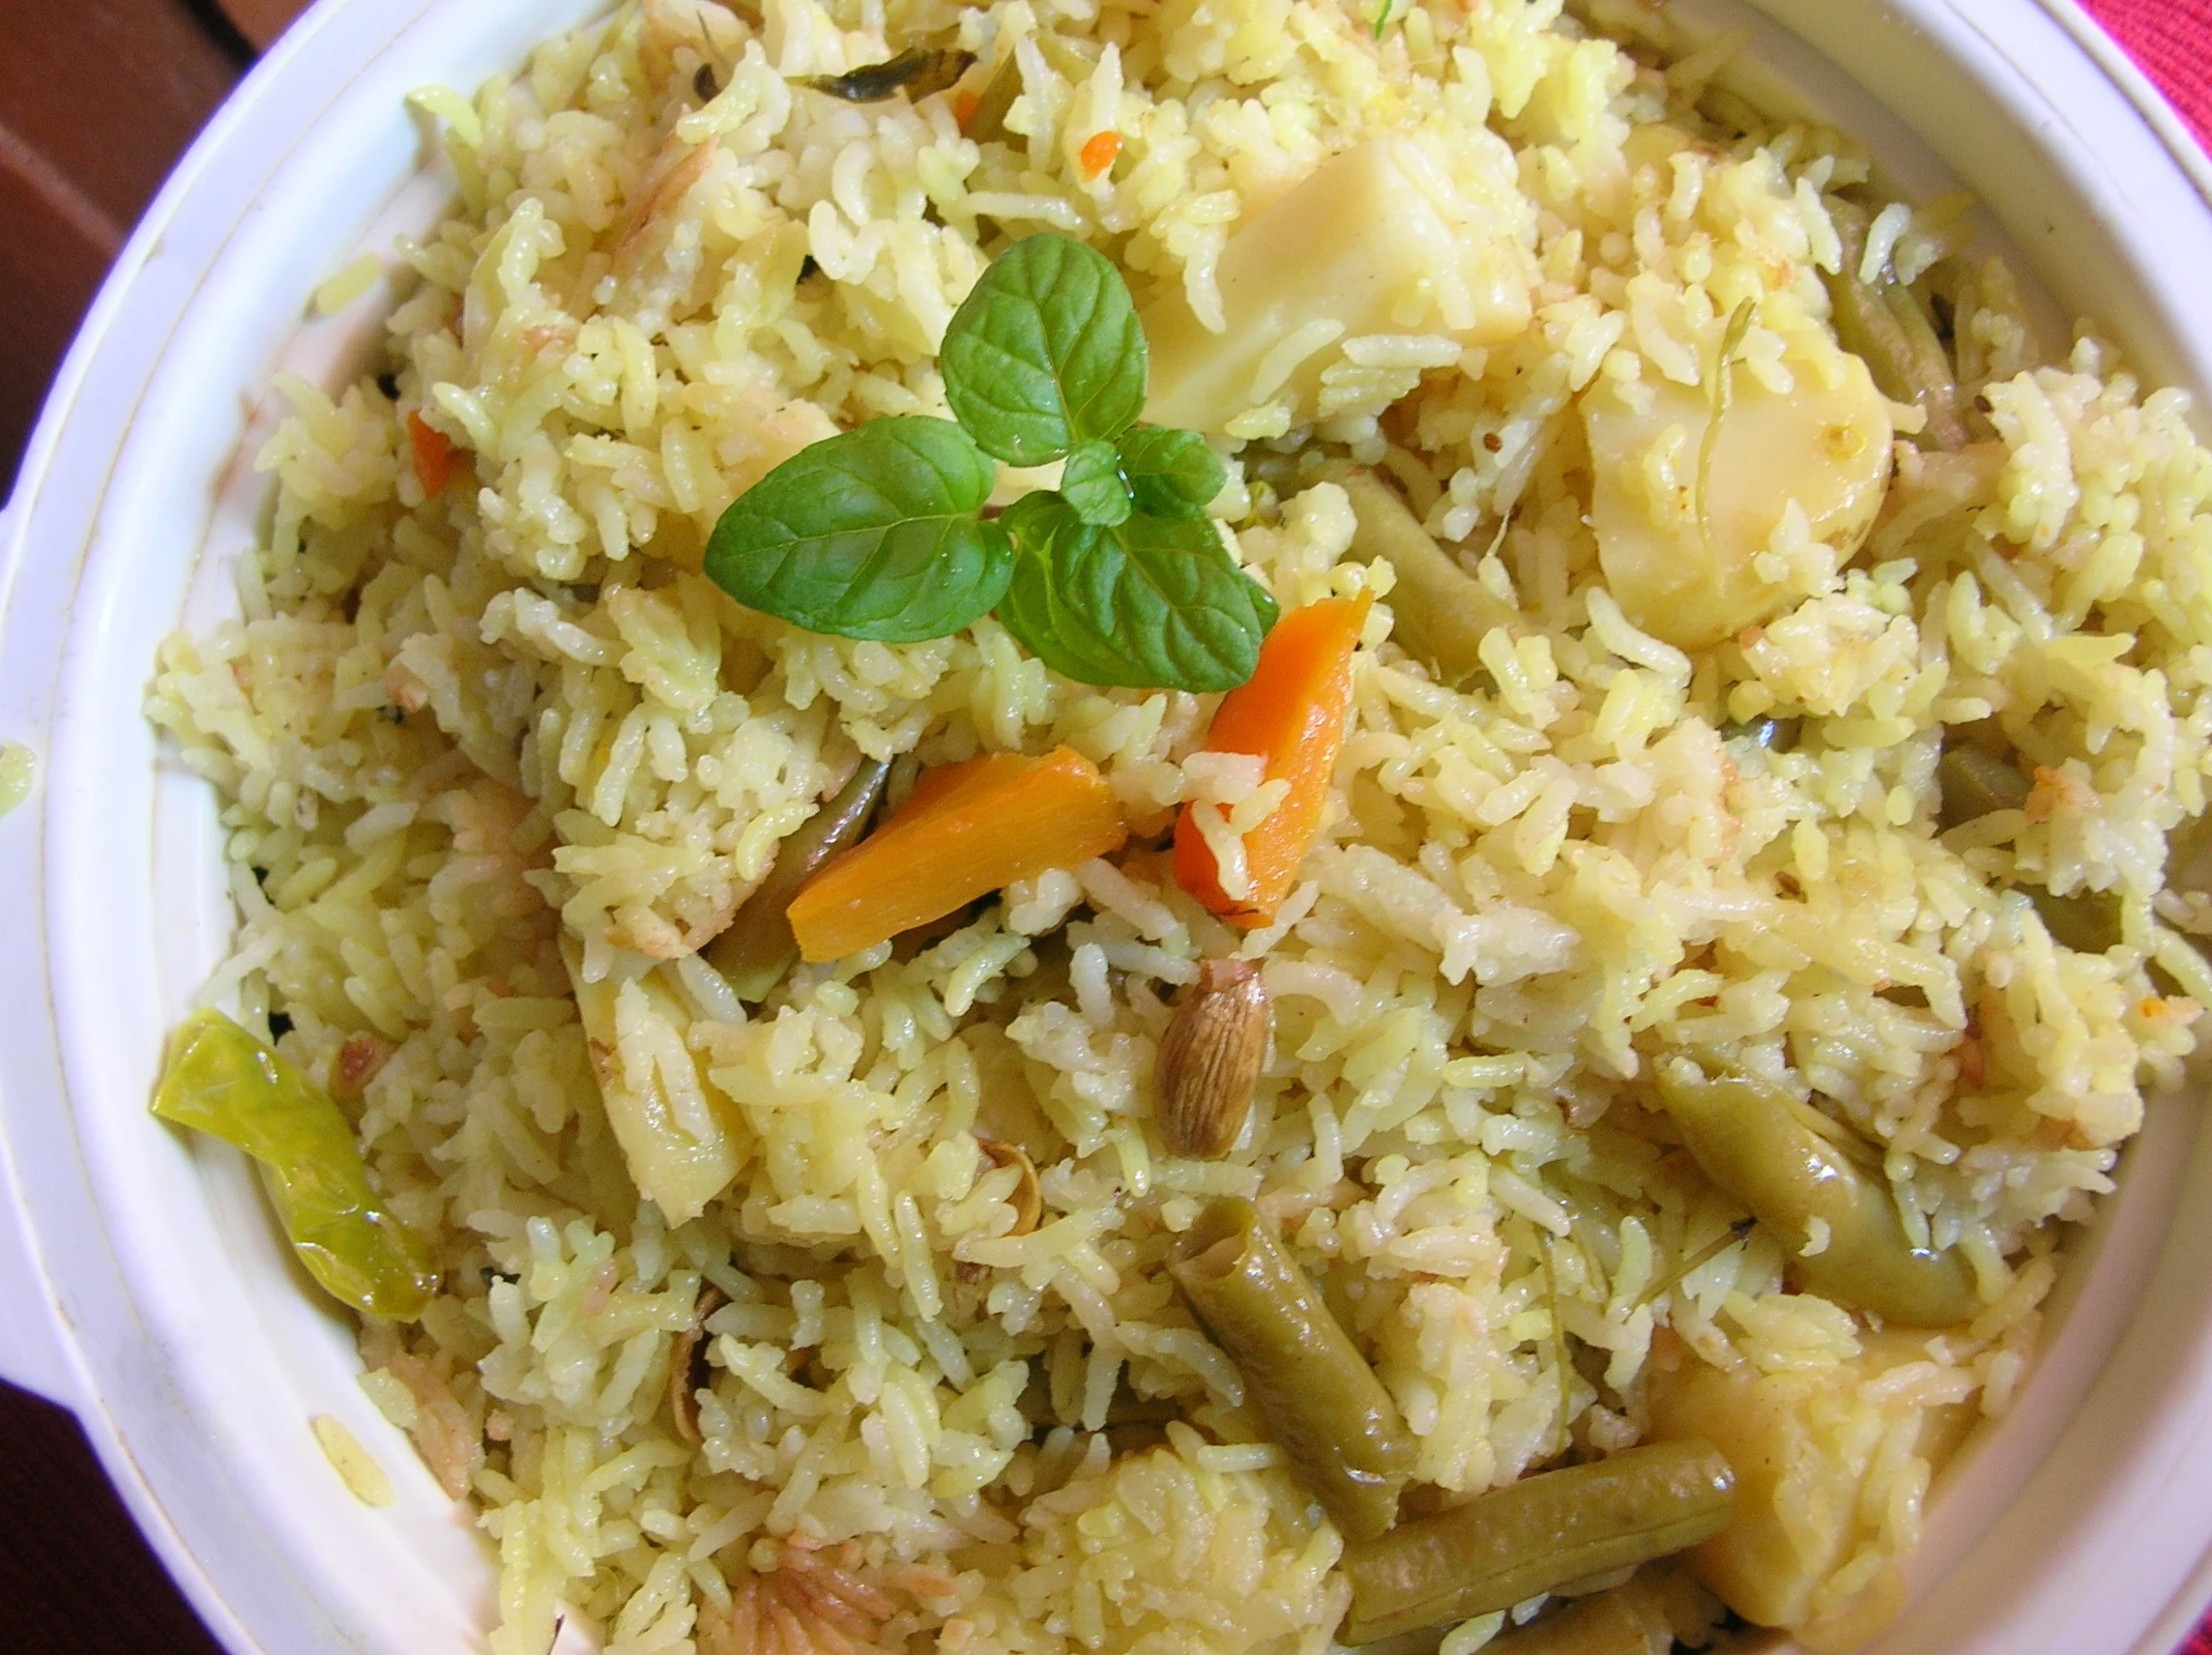
Vegetable pulao made entirely in a microwave — separate grains, vibrant vegetables, no stovetop required.
Why Microwave Pulao Is Actually Better in One Way
The microwave's reputation in Indian cooking is poor, mostly because people approach it the way they approach a stovetop — blasting everything on full power from start to finish. But for rice-based one-pot dishes, the microwave has a genuine advantage nobody talks about: it heats from every direction simultaneously, not just from the bottom up.
On a stovetop, heat travels upward through the pot. The rice at the base absorbs more heat than the grains at the top. This is why you will always find the first spoonful slightly more cooked than the last. Inside a microwave, the energy penetrates the dish uniformly, which means the grain at the very top of the bowl receives roughly the same thermal input as the one sitting at the bottom. The result, when done with the right water ratio and a two-phase power approach, is an unusually even pot of rice.
The caveat is power management. Leave it on HIGH throughout and you drive the water out too fast. The outside of each grain cooks while the starchy interior stays raw or, worse, turns gluey. The two-phase method — HIGH to build the boil, then MEDIUM to let steam do its job — is the single most important technique in microwave pulao.
The one thing most recipes miss
The resting period after switching off the microwave is not optional padding added to fill word counts. Steam inside the covered bowl continues to cook the rice for a full 8 to 10 minutes after the magnetron turns off. Skipping this step is why most people end up with slightly undercooked centers even when following a recipe to the letter.
The Food Science — Basmati, Amylose, and Why Water Ratio Matters
Basmati is one of the highest-amylose rice varieties in the world. Amylose is a straight-chain starch molecule. During cooking, amylose-rich grains absorb water more slowly, swell less, and set firmer compared to glutinous, high-amylopectin varieties like Japanese short-grain. This is precisely what gives properly cooked basmati its signature dry, elongated, separate-grain texture — and it is also why basmati demands less water than the 1:2 ratio that works fine for regular white rice.
For soaked basmati in a microwave, the ideal ratio is 1.75 cups of water per cup of rice. For unsoaked basmati, add an extra quarter cup. Here is what goes wrong at the extremes: too little water and the grains on the outer layer of the bowl cook before enough steam has reached the center; too much water and the extended time at heat causes amylose to leach out of the grain and dissolve into the cooking liquid, producing that sticky, wet texture.
Soaking matters precisely because it pre-hydrates the outer layer of each grain. Water can then penetrate to the starchy core during the much shorter microwave cook time. Without soaking, you need either more water or more time — and more time at heat pushes the outer grains past their ideal texture before the center is done.
Soaking shortcut
If 30 minutes feels too long, a 15-minute soak in warm water achieves about 70 percent of the same result. Cold water soaking for 30 minutes is better for grain elongation. Avoid soaking for more than 45 minutes as the grains can begin to break down at the surface.
Why aged basmati performs better
Older basmati rice — typically marked as aged 1 to 2 years on premium packets — has lower moisture content in the raw grain. This means less excess surface moisture during cooking, which translates directly to more separate, fluffy grains. Fresh-crop basmati absorbs water faster and can turn slightly sticky at the same ratios. If your packet does not specify aging and the pulao keeps coming out clumpier than expected, reduce water by 2 tablespoons per cup as a starting point.
Ingredients and What Each One Does
On the subject of asafoetida — this ingredient is underused in microwave recipes and it makes a meaningful difference. Hing adds the same umami-adjacent quality that an onion base gives to a European rice dish. A small amount, dissolved in water so it disperses evenly, transforms a straightforwardly spiced pulao into something that tastes as if it has been cooking for hours.
Microwave Power Guide for Different Appliances
Microwave recipes that say only HIGH or 500W ignore the fact that a 700W machine and a 1100W machine produce very different results at the same setting name. The table below maps common wattages to the timings in this recipe.
| Microwave Wattage | Spice blooming step | Phase 1 (HIGH) | Phase 2 (MEDIUM) | Rest time |
|---|---|---|---|---|
| 700W | 2 min | 10 min HIGH | 10 min 70% | 10 min |
| 800W (most common) | 90 sec | 8 min HIGH | 8 min 60% | 10 min |
| 900W | 90 sec | 7 min HIGH | 7 min 60% | 8 min |
| 1000W+ | 60 sec | 6 min HIGH | 6 min 50% | 8 min |
How to find your microwave's actual wattage
Check the label on the inside of the door or the back panel. If the label has been removed, fill a glass measuring cup with exactly 1 cup of cold water and microwave on HIGH. If it boils in under 2 minutes, you are above 1000W. Between 2 and 2.5 minutes, you are in the 800–900W range. Closer to 3 minutes, plan for 700W timings.
Full Step-by-Step Recipe
-
1Rinse and soak the rice Rinse basmati under cold running water, stirring with your fingers, until the water runs completely clear. This removes loose surface starch. Cover with fresh cold water and soak for 30 minutes. Drain well just before cooking — sitting in water longer than 45 minutes weakens the grain structure.
-
2Bloom whole spices in ghee In a 2 to 2.5-litre microwave-safe glass bowl, combine the ghee, bay leaves, cinnamon, bruised cardamom pods, cloves, peppercorns, cumin seeds and asafoetida. Microwave uncovered on HIGH for 90 seconds, stirring once at the 45-second mark. The ghee should be hot and fragrant. This blooming step extracts fat-soluble aroma compounds that water cannot dissolve.
-
3Cook down the aromatics Add sliced onion, minced ginger, minced garlic and slit green chillies. Stir so everything is coated in the spiced ghee. Microwave uncovered on HIGH for 4 minutes, stirring once at 2 minutes. The onion should be wilted and lightly golden at the edges. If your microwave runs hot, check at 3 minutes to prevent burning.
-
4Add vegetables and dry spices Stir in carrot batons, green beans, peas, and parboiled potato cubes. Add turmeric, red chilli powder, sugar and salt. Mix well so the spiced ghee coats every piece. Microwave uncovered on HIGH for 3 minutes to begin softening the vegetables slightly and wake up the ground spices.
-
5Fold in drained rice and add water Add the drained soaked rice to the bowl. Fold gently with a wide spoon — the goal is to coat the grains in the spiced base without breaking them. Pour in 3.5 cups of water at room temperature. Do not use ice-cold water as it slows the initial boil; do not use boiling water as it can cause uneven cooking at the base of the bowl before the rest heats through.
-
6First cook cycle — building the boil Cover the bowl with a tight-fitting microwave-safe lid. If you do not have a lid, use microwave-safe cling film pressed directly onto the surface with a small vent hole — this prevents excess steam loss. Microwave on HIGH for 8 minutes (adjust per the power guide above). Do not open the lid during this phase. You will hear a steady boil inside.
-
7Second cook cycle — gentle steam finish Without opening the lid, reduce power to MEDIUM (approximately 50–60 percent) and microwave for a further 8 minutes. This lower power setting keeps the temperature just high enough to maintain an active steam environment inside the bowl without driving the outer grains past their ideal doneness.
-
8Rest, uncover and fluff Remove the bowl from the microwave and leave it on the counter, still covered, for 8 to 10 minutes. This is the most important step: the residual steam finishes cooking the innermost grains while the outer ones rest and firm up slightly. Uncover, taste and adjust salt. Scatter fresh chopped coriander over the top. Fluff gently with a fork from the edges inward, using lifting strokes rather than stirring. Serve immediately.
The fork technique matters
A fork pulls grains apart without crushing them. A spoon presses grains against each other and breaks the surface, releasing starch and making the texture sticky. Always use a fork to fluff rice, and work from the edges toward the center with upward folding strokes.
Troubleshooting — Mushy Rice, Undercooked Grains, Stuck Base
| Problem | Likely cause | Fix for next batch |
|---|---|---|
| Mushy, sticky texture | Too much water, or fully HIGH power throughout, or lid not tight enough, or too long a soak | Reduce water by 1/4 cup, switch to 60% power for the second phase, press the lid down firmly |
| Crunchy or dry centers | Too little water, soak was too short, or rest period was cut short | Add 1/4 cup extra water and extend rest to 12 minutes with lid on |
| Rice stuck to the base | Bowl too thin-based, power too high for too long, or no fat layer between rice and bowl | Use a thicker glass bowl, coat the base with a thin film of ghee before adding rice, reduce first cycle by 1 minute |
| Vegetables turned grey or mushy | Vegetables cut too small, or too long in the first cooking cycle without the rice absorbing heat | Cut to 1–2 cm pieces minimum; add the rice and water immediately after step 4, do not leave vegetables alone in the bowl |
| Pulao smells flat, no aroma | Whole spices were not bloomed long enough in the ghee, or the cumin seeds were not fresh | Extend the spice blooming step by 30 seconds; replace cumin seeds if older than 6 months |
| Rice cooked unevenly — top raw, bottom overcooked | Microwave turntable was off or bowl too large for the cavity | Use a smaller, deeper bowl rather than a wide shallow one; stir once at the halfway point of Phase 1 if your machine lacks a turntable |
Seasonal Variations and Additions
The base recipe above works through the year. What changes is which vegetables you fold in at step 4. The rule is to choose vegetables whose cooking time roughly matches a lightly parboiled potato.
Winter
Thinly sliced leek instead of onion. Add small broccoli florets, finely shredded cabbage, and baby spinach in the last 2 minutes of the second cooking cycle — not before, or it turns olive-green.
Monsoon
Corn kernels from one ear of fresh corn add a natural sweetness. Whole dried red chillies bloomed with the spices add visible texture. A small piece of dried mango (amchur) stirred into the water gives a faint tartness.
Summer
Diced zucchini works well but releases water — reduce the added water by 3 tablespoons to compensate. A handful of cashews browned separately in a dry pan and scattered over the finished rice adds a contrast of crunch.
Lunchbox version
Replace half the water with thin coconut milk for a mild, slightly sweet version that children take to readily. Omit the green chillies and reduce red chilli powder to a pinch. The coconut milk also keeps the rice from drying out over the few hours it sits in a lunchbox.
The paneer addition
Paneer cubes added raw to step 4 tend to turn rubbery in the microwave. The correct approach is to soak cubed paneer in hot water for 5 minutes to soften it, then fold it gently into the pulao only after the resting phase — the residual heat warms it through without toughening it.
Mint leaf variation
A small handful of fresh mint leaves folded into the bowl at the start of the rest period — not during cooking — releases their volatile oils into the steam without cooking away. This is the detail that separates a restaurant-quality mint pulao from a home version. The leaves will wilt from the heat but remain bright green and fragrant.
What to Serve With Vegetable Pulao
Pulao has enough flavour to stand as a complete meal, but it pairs particularly well with a cooling raita — plain yogurt stirred with grated cucumber, a pinch of cumin and a handful of chopped mint. The contrast between the warm spiced rice and the cold, tangy yogurt is one of the canonical combinations of North Indian home cooking.
A thin dal, particularly a yellow moong dal with a tempering of dried red chilli and mustard seeds, works well as an accompaniment because its mild, slightly earthy quality does not compete with the pulao spices. A thick, heavily spiced dal would overwhelm the dish.
For a more substantial meal, a simple yogurt-marinated vegetable kebab or paneer tikka alongside is the natural escalation. The char from a grill or air fryer provides a textural and flavour contrast the soft pulao lacks on its own.
Storage and Reheating
Refrigerate
Airtight container. Up to 3 days. Cool fully before sealing to prevent condensation.
Freeze
Portion into small containers. Up to 1 month. Lay flat until solid, then stack.
Reheat
Add 1 tsp water per cup. Cover loosely. MEDIUM power, 2 minutes. Stir and serve.
The most common reheating mistake is using HIGH power on cold rice straight from the fridge. The exterior dries out before the center warms through. MEDIUM power with a loose cover and a small amount of added water produces rice that tastes freshly made. The added moisture is critical — without it, the already-cooked starch in the grains does not have enough water to re-gelatinize and the texture turns chalky.
Nutrition Per Serving (approximate, with ghee)
Basmati rice has a lower glycaemic index than regular white rice — typically around 50 to 58 compared to 72 for standard long-grain white rice — partly due to its high amylose content, which digests more slowly. The whole spices in the recipe, particularly cumin and cinnamon, have demonstrated antioxidant properties in laboratory settings, though the amounts used in cooking are modest. The vegetables add meaningful dietary fibre and micronutrients without significantly altering the calorie profile.
If replacing ghee with a neutral oil the fat profile changes (less saturated fat, more polyunsaturated) while the calorie count stays roughly the same. The aromatic performance drops slightly since ghee has a better capacity for extracting fat-soluble compounds from whole spices, but the difference is not dramatic.
Frequently Asked Questions
Why does my microwave pulao always turn out mushy?
Mushiness comes from one or more of three causes: too much water, running the full cooking time on HIGH without dropping to MEDIUM, or opening the lid before the rest period is complete. Use 1.75 cups of water per cup of soaked basmati, switch to 50–60 percent power for the second cooking phase, and keep the lid on for at least 8 minutes after the microwave turns off.
What size bowl should I use?
The bowl should hold at least 3 times the volume of the raw rice. For 2 cups of uncooked rice, use a 2 to 2.5-litre bowl. Rice expands significantly during cooking and active boiling generates steam — a bowl that is too shallow will overflow even with a lid on.
Can I make this without soaking the rice first?
Yes, but the result will be less fluffy and the grains will be shorter. If skipping the soak, increase water by a quarter cup for every cup of rice and add 3 to 4 minutes to the first HIGH-power cycle. Check the texture after resting and if the center is still firm, return to the microwave (covered) for 2 minutes on MEDIUM and rest again for 5 minutes.
Which vegetables work best and which should I avoid?
Dense, medium-moisture vegetables that cook in roughly the same time as a lightly parboiled potato are ideal: carrots, green beans, peas, corn, broccoli, cauliflower. Avoid high-moisture vegetables like tomatoes or zucchini unless you reduce your water accordingly. Leafy greens like spinach should only be added in the final 2 minutes of the second cooking cycle, not at the start.
Is cooking rice in a microwave safe?
Completely safe. The microwave cooks rice by exciting water molecules inside the grains, the same physical process as steam cooking. Use microwave-safe glass or BPA-free plastic containers. Never use metal, foil, or containers with metallic rims, and always ensure your lid has at least a small vent to allow steam to escape safely.
How long does leftover pulao keep?
Up to 3 days in the refrigerator in an airtight container. Let it cool completely before sealing to prevent condensation from making the rice sticky. For longer storage, freeze in portion-sized containers for up to one month. Reheat from frozen by microwaving on MEDIUM for 4 to 5 minutes, adding 1 teaspoon of water per cup before heating.
Can I use brown basmati rice for this recipe?
Yes, but the cooking time increases substantially. Brown basmati has an intact bran layer that water penetrates much more slowly. Use the same recipe but soak for at least 45 minutes, increase water by half a cup, and double both cook cycles. The rest period should be extended to 15 minutes. The texture will be nuttier and chewier than white basmati.
Why is asafoetida in this recipe? Can I skip it?
Asafoetida adds a savory, onion-garlic-like depth that comes from sulfurous compounds in the resin. In very small amounts, it functions as a flavour amplifier rather than a noticeable flavor on its own. You can skip it without the recipe failing, but the spice base will taste slightly flatter. If you have it, use it — even a small pinch dissolved in a drop of water makes a real difference.